How to Make a Coloring Book: Step-by-Step Guide for Beginners
To make a coloring book, create or gather black-and-white illustrations and compile them into a printable format. Ensure each page is engaging and suitable for coloring.
Creating a coloring book can be a fun and rewarding project. Start by brainstorming themes that interest your target audience, whether it’s animals, fantasy, or landscapes. Use software like Adobe Illustrator or free tools like GIMP to design or edit your images.
Ensure the lines are clear and bold for easy coloring. After compiling your images, arrange them in a logical sequence. Use a PDF editor to create a printable file. Once done, you can print the book at home or use a professional printing service. Marketing your coloring book online can help reach a wider audience.
Choosing Your Theme
Choosing the right theme for your coloring book is crucial. It sets the tone and captures your audience’s interest. This section will guide you through the process of selecting a theme, ensuring your coloring book stands out.
Finding Inspiration
Begin by exploring different sources of inspiration. Look at existing coloring books, art galleries, and nature. Consider what subjects excite you the most. Inspiration can come from everyday life, travel experiences, or even dreams.
Here are some places to find ideas:
- Art museums and galleries
- Children’s storybooks
- Nature walks and parks
- Travel photos and memories
Defining Your Audience
Understanding your audience is essential. It helps tailor your content to their preferences and interests. Ask yourself these questions:
- Who will color in your book?
- What age group are they?
- What themes do they enjoy?
For example, children might love themes like animals, fairy tales, and simple patterns. Adults might prefer intricate designs, mandalas, or nature scenes.
Here is a simple table to help you define your audience:
| Audience | Preferred Themes |
|---|---|
| Children | Animals, Fairy Tales, Simple Patterns |
| Adults | Intricate Designs, Mandalas, Nature Scenes |
Once you know your audience, you can create a theme that resonates with them. This ensures your coloring book is engaging and enjoyable for your target group.
Gathering Materials
Creating a coloring book can be a fun and rewarding project. It starts with gathering the right materials. The materials you choose will determine the quality and durability of your book. Here is a guide to help you gather the essential supplies and optional tools.
Essential Supplies
First, gather the essential supplies for your coloring book. These items are necessary to get started.
- Paper: Use thick, high-quality paper to prevent colors from bleeding through.
- Pencils: Sketch your designs with pencils. Get a variety of hardness levels.
- Erasers: Use erasers to fix any mistakes in your sketches.
- Markers or Pens: Outline your designs with black markers or pens.
- Scanner or Camera: Digitize your drawings with a scanner or a high-resolution camera.
Optional Tools
These optional tools can make the process easier and more enjoyable. They are not necessary, but they can enhance your experience.
- Lightbox: A lightbox helps trace your designs neatly.
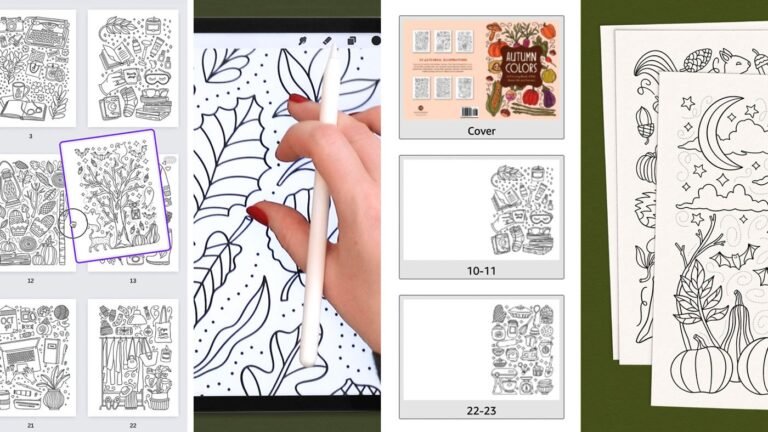
- Tablet: Use a tablet for digital drawing. It allows for easy editing.
- Coloring Software: Software like Adobe Illustrator can help refine your designs.
- Binding Machine: Bind your pages together to create a professional-looking book.
- Cutting Tools: Use cutting tools for precise trimming of your pages.
By gathering these materials, you will be well-prepared to create a beautiful and engaging coloring book.
Sketching Your Designs
Sketching your designs is a vital step in creating a coloring book. This stage allows you to bring your imaginative ideas to life. It is important to follow certain techniques to make your sketches appealing and consistent.
Basic Drawing Techniques
Start with simple shapes and lines. Use circles, squares, and triangles to form the base of your drawings. This helps in creating a balanced structure.
- Use light strokes: Begin with light pencil strokes. It makes it easier to erase mistakes.
- Focus on proportions: Ensure the elements are proportionate. This makes your designs look more natural.
- Add details gradually: Begin with broad details, then move to finer details.
Creating Consistent Styles
Consistency is key in a coloring book. Consistent styles make your book look professional and cohesive.
- Choose a theme: Decide on a theme for your coloring book. It could be animals, flowers, or landscapes.
- Stick to a style: Maintain the same drawing style throughout the book. This creates a uniform look.
- Repeat elements: Use repeating elements to create a sense of continuity. For example, similar borders or patterns.
Below is a table that summarizes the techniques for creating consistent styles:
| Technique | Description |
|---|---|
| Choose a theme | Decide on a central theme for your book. |
| Stick to a style | Maintain the same drawing style throughout. |
| Repeat elements | Use similar elements to create continuity. |
By following these techniques, you can create beautiful and cohesive designs for your coloring book.
Digitizing Your Artwork
Digitizing your artwork is a crucial step in creating a professional coloring book. This process involves converting your hand-drawn sketches into digital files that can be edited, colored, and printed. It allows you to enhance your artwork and make it suitable for publishing.
Scanning Your Sketches
Begin by scanning your sketches using a high-resolution scanner. Set the scanner to at least 300 DPI for clear, detailed images. Ensure the sketches lie flat on the scanner bed to avoid distortions.
After scanning, save the files in a format like PNG or TIFF for the best quality. These formats preserve the detail and quality of your original sketches. Organize your scanned files in a folder, naming each file clearly for easy access.
Using Digital Tools
Use digital tools to refine and enhance your scanned sketches. Software like Adobe Photoshop and Illustrator are excellent choices. These tools allow you to clean up lines, adjust contrast, and add digital elements.
Start by opening your scanned file in the software. Use the pen tool or brush tool to trace over your lines, making them crisp and clean. Adjust brightness and contrast to make the lines stand out.
Consider using layers to separate different elements of your drawing. This makes it easier to edit individual parts without affecting the whole image. Save your work frequently to avoid losing any progress.
| Tool | Use |
|---|---|
| Pen Tool | Tracing lines |
| Brush Tool | Adding details |
| Eraser Tool | Removing unwanted marks |
| Layers | Organizing elements |
Export your final digital artwork in a format suitable for printing, like PDF. Ensure the resolution remains high to maintain quality.
Editing And Refining
Editing and refining your coloring book drawings is a crucial step. It ensures your book looks professional and is enjoyable to color. Follow these steps to polish your artwork and make it ready for printing.
Cleaning Up Lines
First, ensure all lines are smooth and clean. Use a fine-tipped eraser to remove any stray marks. If you are using digital tools, take advantage of the eraser function to clean up your lines.
Consistency is key. Make sure your line thickness is uniform throughout the book. This helps your pages look cohesive and professional.
Adding Details
Adding details can make your coloring book more engaging. Consider incorporating small patterns or textures. These can add depth and interest to your illustrations.
- Textures: Add tiny dots or lines to create texture.
- Patterns: Integrate simple patterns like stripes or polka dots.
- Shading: Lightly shade areas to give a sense of depth.
Remember, details should be fun to color, not overwhelming. Strike a balance between simplicity and complexity.
| Step | Action |
|---|---|
| 1 | Clean up lines using eraser or digital tools |
| 2 | Ensure line thickness is consistent |
| 3 | Add textures, patterns, and shading |
Follow these steps, and your coloring book will be a joy to color!
Arranging Your Pages
Creating a coloring book is a fun project. The arrangement of your pages is crucial. It ensures the flow and engagement of your book. Let’s dive into the key aspects of arranging your pages.
Page Layouts
Decide on the layout of each page. A consistent layout helps readers. It makes the book user-friendly.
- Single Image Per Page: One large image per page is ideal. Kids love having space to color.
- Multiple Images Per Page: Include smaller images on one page. This provides variety.
- Bordered Images: Add borders to images. It keeps the design neat.
| Layout Type | Benefits |
|---|---|
| Single Image | Focus and space |
| Multiple Images | Variety and engagement |
| Bordered Images | Neatness and structure |
Including Text And Instructions
Adding text and instructions can enhance the coloring experience. It’s a great way to engage kids and guide them.
- Captions: Simple captions describe the images.
- Instructions: Provide instructions on how to color.
- Fun Facts: Include fun facts related to the images. This makes learning fun.
Here is an example:
Image: A dinosaur
  Caption: This is a T-Rex.
  Instruction: Use green for the body and yellow for the eyes.
  Fun Fact: T-Rex lived 68 million years ago!
By following these tips, you can create an engaging coloring book. The right arrangement keeps kids interested. Happy coloring!
Printing Your Book
Printing your coloring book is an exciting step. It transforms your designs into a tangible product. This section will guide you through the essential steps to print your book.
Choosing Paper
Choosing the right paper is crucial. The paper quality affects the coloring experience. Here are some points to consider:
- Weight: Heavier paper (like 120gsm) prevents ink from bleeding through.
- Texture: Textured paper adds an interesting feel for coloring.
- Finish: Matte finish is preferred. It allows colors to adhere better.
Binding Options
Binding holds your book together. Different binding options offer different benefits:
| Binding Type | Advantages |
|---|---|
| Saddle Stitch | Cost-effective and ideal for smaller books. |
| Perfect Binding | Gives a professional look. Suitable for thicker books. |
| Spiral Binding | Allows the book to lay flat. Great for easy coloring. |
Choose the binding that best suits your needs. Each type has unique benefits.
Marketing And Selling
Creating a coloring book is just the beginning. To ensure success, you must focus on marketing and selling. These steps will help you reach the right audience and boost sales.
Creating A Sales Strategy
A solid sales strategy is crucial. Start by identifying your target audience. Ask yourself who would enjoy your coloring book. Is it for kids, teens, or adults?
Next, set a price point. Research similar books to find a competitive price. Remember to factor in production costs and desired profit margins.
Consider different sales channels. Will you sell online, in bookstores, or at events? Each channel has its own advantages and requirements. Create a plan for each channel you choose.
Finally, track your sales. Use tools and software to monitor performance. Adjust your strategy based on this data.
Utilizing Social Media
Social media is a powerful tool for marketing your coloring book. Start by creating accounts on popular platforms like Facebook, Instagram, and Twitter.
Post regularly about your book. Share images, videos, and behind-the-scenes content. Engage with your followers by responding to comments and messages.
Run paid ads to reach a broader audience. Target your ads based on age, interests, and location. This will help you reach potential buyers more effectively.
Collaborate with influencers. Find social media users with a large following in your niche. Offer them a free copy of your book in exchange for a review or shoutout.
Finally, use hashtags to increase visibility. Research popular hashtags related to coloring books and use them in your posts.
Frequently Asked Questions
How Do I Start Making A Coloring Book?
Begin by choosing a theme. Sketch your designs on paper or digitally. Convert sketches into clean line art using software.
What Tools Do I Need?
You’ll need drawing tools like pencils or a digital tablet. Software like Adobe Illustrator helps in refining and finalizing your designs.
How Do I Publish My Coloring Book?
You can publish through platforms like Amazon KDP. Alternatively, consider local printing services for physical copies.
Can I Sell My Coloring Book Online?
Yes, you can sell on platforms like Etsy, Amazon, or your own website. Marketing is crucial.
Conclusion
Creating a coloring book can be a fun and rewarding project. Follow the steps outlined to produce a unique and engaging book. Experiment with different designs and themes to captivate your audience. Your creativity and dedication will ensure your coloring book stands out.
Enjoy the process and happy creating!
